Artful. Festive. Special. Of all the DIY skills to take on, calligraphy has always seemed just out of reach. I’ve searched high and low for classes (to no avail). And up until now, instruction books have centered on old-school calligraphy: think illuminated manuscript-esque gothic lettering. Not exactly the style du jour when it comes to contemporary design.
Thankfully, designer Molly Suber Thorpe’s new book puts a glorious, swirly capital “M” on the title’s keyword. Modern Calligraphy is precisely that: a learning guide to today’s freewheeling approach to elegant hand lettering.
The early chapters take you through the, ahem, ABCs of this contemporary craft, from the supplies you need to holding the pen correctly and taking those first baby steps as you learn upstrokes, down strokes, then move on to actual letters and words. There’s even a section devoted to left-handed calligraphy. There are practice exercises and photos galore, each and every detail clearly explained and illustrated.
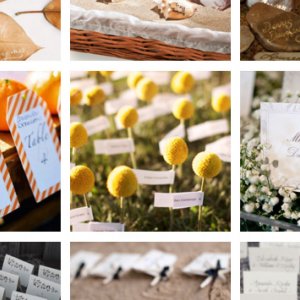
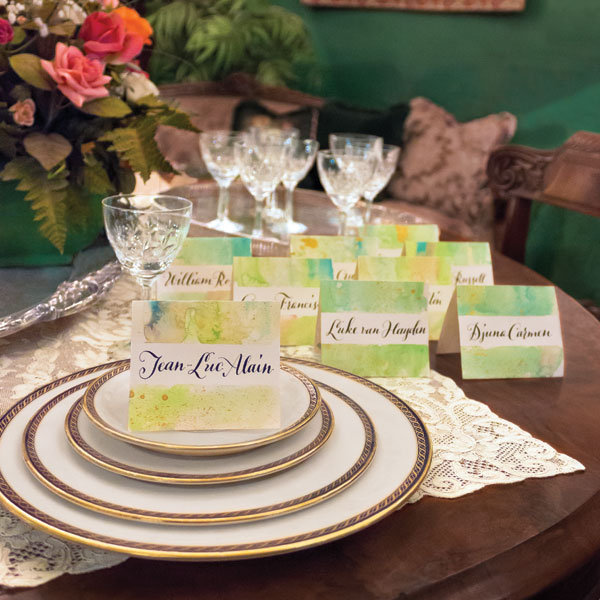
Once the basics are mastered, you can put your mad skills to use as you see fit: addressing invitations, perhaps, or crafting escort or table cards. Or how about taking on these lovely place cards — a particularly wedding-worthy project that combines two major trends, hand calligraphy and watercolor wash?
Fear not, this is a beginner level project — though you’ll want to consult the book for a head start on materials and techniques.
Watercolor Wash Place Cards
These place cards will make a statement on any table. Each card has a unique watercolor wash background flecked with contrasting acrylic paint, and the possible color combinations of watercolor and calligraphy are endless.
Level: Beginner
- Yield: 75 place cards
- Time: 8 hours (including drying time)
- Budget: $65.00
Supplies:
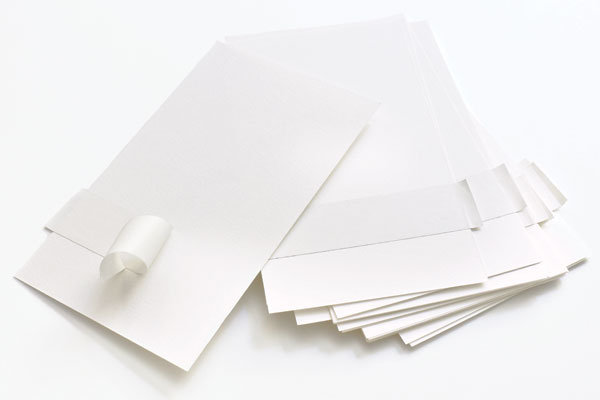
- 90 3.5x6-inch pieces of heavy watercolor paper (for cards)
- Wide paintbrush
- Dish of water
- Paper towels
- Small paintbrush for watercoloring
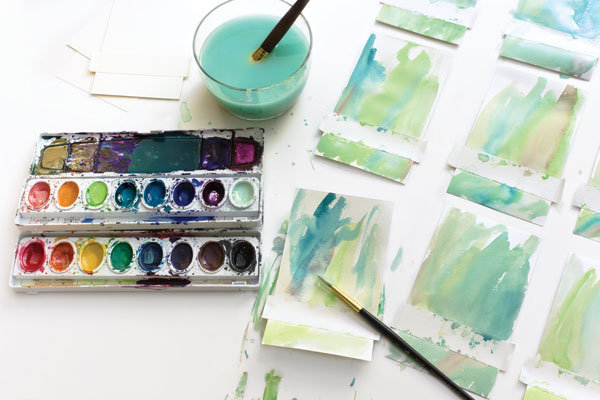
- Pan of assorted watercolors
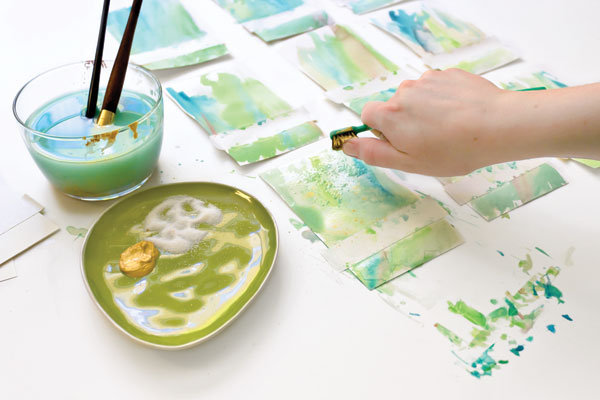
- 2 tbsp table salt
- 1 tbsp acrylic paint in accent color for splattering
- Old toothbrush
- Bone folder (a tool used to crease and fold paper, available in craft stores)
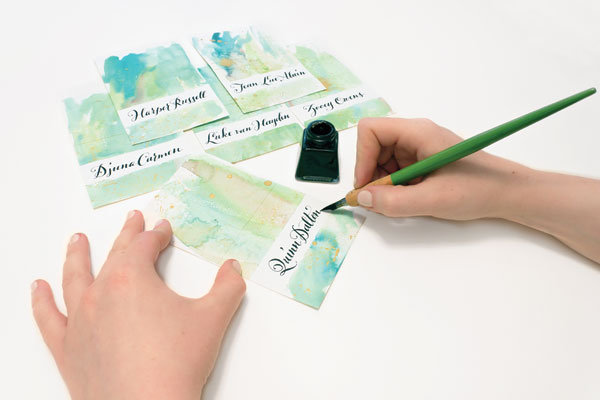
- Ink, watercolor or gouache of your choice for the calligraphy
- Calligraphy nib and holder
Instructions:
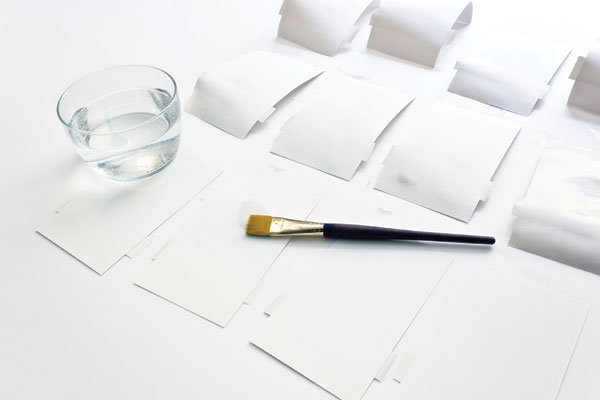
1. Apply a strip of artist tape across the full width of each watercolor paper card, starting 1 inch up from the bottom short edge. Press the tape down firmly, especially along the edges, so that no watercolor will be able to seep underneath. There should now be 1 inch of paper exposed below the tape and 4 inches exposed above it.
2. Using the large paint brush, brush both the front and back of each card with water, then pat dry with a paper towel. (This prevents the paper fibers from expanding unevenly and warping.) Since there are so many cards, I recommend painting about twelve at a time so your workspace doesn’t get too cluttered.
3. Using the smaller paint brush, paint the cards with an abstract watercolor design in the colors of your choice. (I normally combine two to four watercolor shades per card, but play around with what you like best.) Don’t let this step scare you! This should be liberating because there is no wrong way to do it. You can fill up the entire paper with paint or leave portions of it unpainted. You can overlap the colors or keep them from touching. You can paint uneven blobs or perfect pinstripes or streaks fanning out in circles like fireworks. You can use light, similar shades for an elegant, understated look, or bright, contrasting ones for a bold, festive effect. Each card can be different — if you use the same colors, they will tie together in a series.
4. If your paper is soaking wet, blot off excess watercolor with a folded paper towel. Then sprinkle the cards with a pinch of table salt. The salt crystals create a unique pattern by absorbing the wet color they land on, producing slightly lighter spots when you brush off the salt later (see step 6).

5. With the old toothbrush, splatter acrylic paint randomly over the card. Choose a color that will really stand out from the background colors you chose. I really like using gold to add some sparkle. Lay flat and let dry.
6. Brush off the salt and carefully peel off the tape. If the cards aren’t flat (which can happen in humid weather), press them between a stack of books overnight.
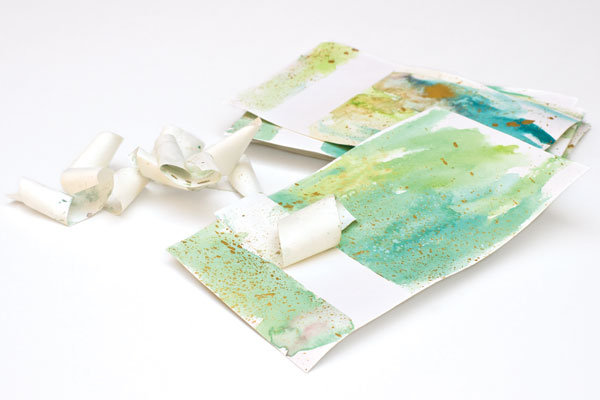
7. Fold the cards in half and make a sharp crease with a bone folder.
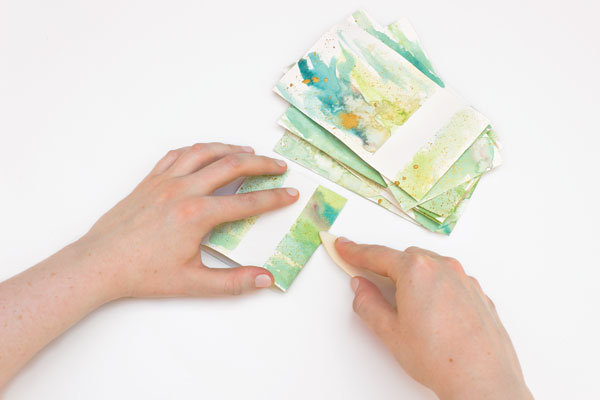
8. Use ink, watercolor, or gouache to calligraph the guests’ names in the blank strip on each card. If you’re nervous about messing up, just practice each name on scrap paper a few times until you’re comfortable. Let dry completely.
Photos and how tos from: Modern Calligraphy—Everything you need to know to get started in script calligraphy, plus 20 DIY projects for weddings, parties, blogs, and more, by Molly Suber Thorpe (St. Martin’s Press, 2013).
—Mary Clarke
- Anonymous's blog
- Log in or register to post comments