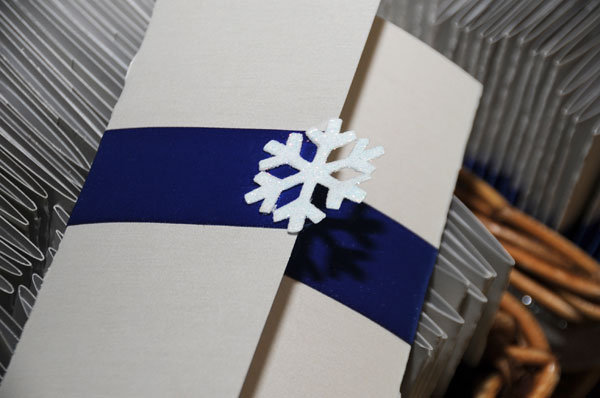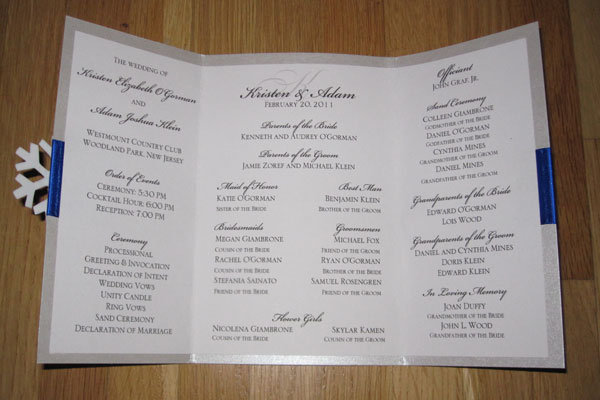
Photo Credit: Jessica Lauren Photography
For my wedding, I knew that I wanted to have ceremony programs, but I was having the hardest time finding a style that I liked for a reasonable price. My favorite professional ones would’ve cost at least $5 a pop (and with 135 guests coming, that was out of the question!), and the DIY kits at craft stores just weren’t doing it for me. So after a lot of daydreaming, I came up with a design I loved that I could make myself.
I'm just going to warn you now: This was a time-consuming project. In retrospect, I really should've started it more than two weeks before my wedding.
The first—and most important—step was finding the right card stock to match the other elements of my wedding. I heard about a great paper product company called Paper Source and was thrilled to find there was a location less than an hour away from me.
I used this paper in silver shimmer for the outer card stock. For the inner stock, I headed over to Staples to pick up a bulk pack of plain white cover stock. It’s important to use cover stock rather than plain paper for the interior – card stock can sometimes jam a home printer, and regular paper can’t withstand the spray adhesive you’ll use later.
Then, I took a swatch of my bridesmaids’ dresses over to Michaels and found a ribbon that matched it perfectly. I also found white foam snowflakes, which I added glitter to and used as decorations.

Supplies you need:
• Card stock
• Cover stock
• Ruler
• Paper cutter
• Spray adhesive
• 1” ribbon
• Decoration
• Poster board
• Double-sided tape
• Super glue
Step 1: The Outer Card Stock
Using the paper cutter, trim the outer card stock to 11" by 7".
Get out your poster board and trace around one of the trimmed papers. This is going to be used as your template. Mark on the poster board at the top and bottom of each fold and also at the top and bottom of where you’ll place the ribbon. This will save you a ton of time later because you won’t need to individually measure each piece.
Fold all of your outer card stock at the marked locations.
Step 2: Attaching the Ribbons
Cut the ribbons to at least 1” longer than the width of the outer card stock. Place your ribbon on the poster board at the marked location and then place your outer card stock on top. Wrap the ends of the ribbons around to the inside of the card stock and attach with double-sided tape. Make sure this is pulled tight, but not so tight that you can't fold up the program!
Step 3: Adding the Decoration
Use a small drop of super glue to attach the decoration onto the ribbon. Hold until the decoration is firmly attached. I used rubber gloves for this part because no matter how hard I try, I can never keep super glue from getting all over my hands.
Step 4: The Inner Cover Stock
To format the names, I used Word and set the columns to 3" on each side and 4.5" in the middle. I used the same fonts on my invitations, programs, menu cards, table number cards, escort cards, and guest book cards for consistency.
After printing the inner cover stock, trim to 10.5" by 6.5".
Step 5: Putting It All Together
Spray a thin layer of spray adhesive on the back of the inner cover stock, and then quickly press onto the outer card stock. If done right, the ends of your ribbons should disappear behind the inner cover stock. Lie flat to dry. After re-folding your programs, you may find that they don’t lie perfectly flat. I placed mine under heavy books for a day after and it solved the problem.
—Kristen O'Gorman Klein
- ssainato's blog
- Log in or register to post comments


Comments
cladyk replied on Permalink
Quick Questions
kklein replied on Permalink
So glad you love them!!
cladyk replied on Permalink
Thanks
DAVISGER replied on Permalink
Fonts
kklein replied on Permalink
Re: Fonts