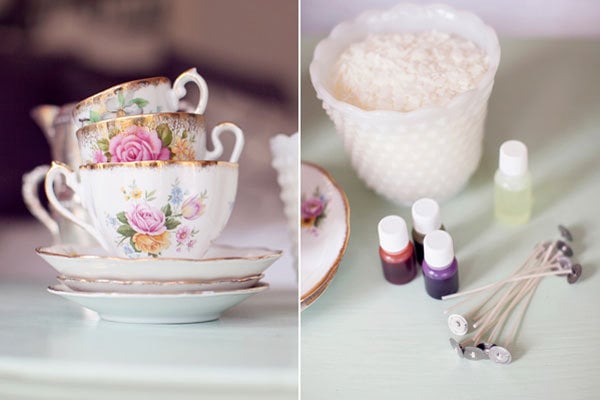
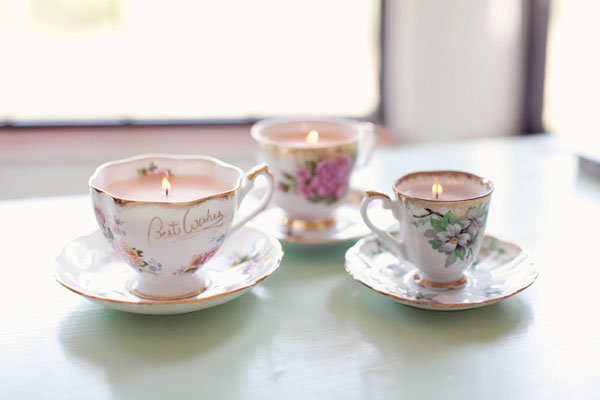
We found this adorable craft project by Rhiannon Nicole from Hey Gorgeous Events and we've been itching to try it! These teacup candles would be perfect for a bridal shower; after the party, you could display them as decorative accents in your home. All you need are a few vintage teacups (hello, flea market), candle wax flakes and a little patience (it takes some time for the wax to dry).
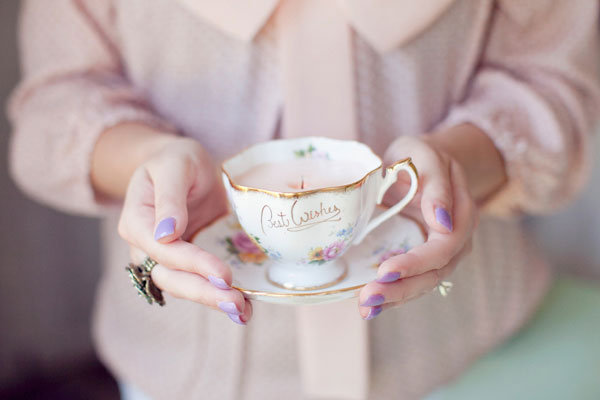
On a side note, we're loving the model's lilac nail polish—we wish we looked this stylish while doing our wedding crafts! All of the gorgeous photos below were shot by the über-talented Jenna McKenzie.
Supplies You Need:
- Vintage tea cups (any will do)
- Eco-friendly candle wax flakes
- A stove, a double boiler and bowl
- Oven mitts and a hot plate/trivet
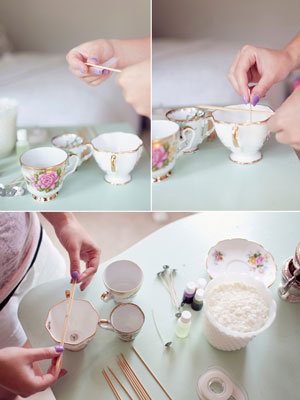
Step 1: Make Wooden Wick Supports
To do this, you can tape together two wooden sticks at the end. Slide in a wax wick so it sits in between the two wooden sticks and then clamp shut the opposite ends and tape together. You should have two sticks taped together at both ends with a wax wick clamped into the middle.
Position the wick into the center of the cup so the metal base around the wick is flush on the bottom of the cup. Repeat this step until all of your cups have a wooden wick support laying across the tops.
Step 2: Prepare the Wax Flakes
Fill a shallow pan or double boiler with water and put over medium to high stove heat. I used a glass Pampered Chef measuring bowl with a spout to melt my wax in. Place your bowl into the water and pour in your wax flakes.
As the water and bowl begins to heat up, your wax flakes will start to melt and become opaque/clear. I use two wooden skewers to stir the flakes especially after I added in my candle scent and colour. Candle dye is just as potent at food coloring; a little will go a long way!
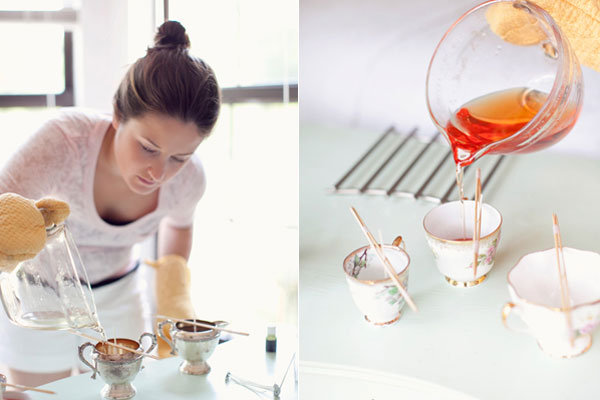
Step 3: Fill the Teacups with Wax
Using oven mitts, use one hand to lift up the bowl out of the water (once the wax has completely melted) and the other hand to wipe off water on the outside of the bowl (don’t burn yourself!)
Have a trivet ready beside your teacups and carefully pour the wax into your teacups, making sure to avoid the wooden skewers laying across the tops. You can always use one hand to hold the wood skewers in place.
Fill the teacups up until about a quarter of an inch of cup is still showing. Immediately wash your bowl to avoid the wax drying or put back in your hot water bath if you will be melting more flakes.
Step 4: Make the Final Touches
Now you get to wait. So go grab some ice cream, hang out for a bit and let the wax completely dry. I’d say give it a few hours at least before you try to trim your wicks or light your candles.
Once the wax looks cloudy, smooth and is hard to the touch (like an ordinary candle you’d light in your home) you’ll know the wax is dry. Using very sharp scissors, cut your wick directly at the wooden skewer clamp and gently pull the wooden skewers away from the wick. Then you can light your beautiful new Vintage Teacup Candles! This was by far the best part.
All photos courtesy of Jenna McKenzie
—Stephanie Brooks
- ssainato's blog
- Log in or register to post comments

