I am so happy to write a guest blog for Bridal Guide!
Today I will be covering one of my favorite topics: sewing. I love to sew, and wedding planning has been a great excuse to get behind my sewing machine! I have also done a lot of wedding-related sewing for my friends as they get married. I recently made a bird cage veil for my friend Kaylie, who got married on Halloween. Kaylie wanted a vintage-inspired veil, so I knew a bird cage veil would be perfect! Here's a peek at the finished product:
|
|

Supplies:
1/2 yard white or ivory russian netting
1/4 yard white or ivory tulle
White or ivory thread
Hand sewing needles
Sewing machine
Sharp scissors
Parchment paper (my secret ingredient!)
Sewing pins
Silk flower
Pearl beads
Hot glue gun (wash your hands after using, most cords for glue guns contain lead)
Hot glue sticks
Bobby pins
Head of a friend (attached, of course!)
|
|

Ok, you will have to be patient with this tutorial. Making a birdcage veil is a lot like making a sculpture! You will need to ask a friend who has about the same size head as you to come over. Also, store your netting very loosley rolled; it will crease if you fold it, and it is hard to get those suckers out! Also, be extremely careful with the netting. It will catch on your scissors when you don't want it to, it will catch on your sewing machine...it will catch on just about anything! Also, be really, really careful when trimming the netting while it's on your friend's head; it is easier than you think to snip her hair!
Step 1: Shaping the veil
Take a piece of the russian netting (about 14" long), and place it on your friend's head. Adjust the netting so it hangs as low or high as you want—over the eyes, under the eyes, over one eye, etc. Also pay attention to the angle of the egde of the netting. Kaylie wanted a sharp angle, with the netting covering one eye. Once you have the "hem" of the veil in the right place, fold the netting on the top of your friend's head to make a dart. The dart will help bring the veil into a "hooded" shape. A dart is kind of like a pleat, but it is in a triangular shape. Also, you will fold the dart together on the underside of where the veil will sit.
Step 2: Pin the dart
|
|
I put the pins where I want to sew the dart. I have pinned the netting to my secret ingredient—parchment paper! The paper allows you to sew the extremely open netting on the sewing machine. After we sew the dart, we will rip the paper off of the netting. Parchment paper is the perfect weight for this; if you use tissue paper, you will have tons of paper bits stuck in your stitches and it will take a long time to pick them all out. Parchment paper might leave a tiny piece here or there, but it is easy to grab. Parchment paper is also perfect because it isn't sticky and won't gum up your machine. :)
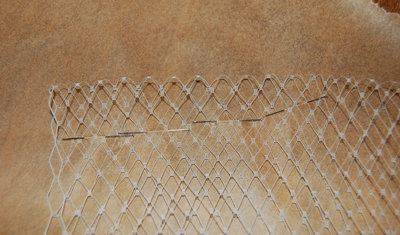
Step 3: Sew the dart
Now sew an angled line to form the dart. As soon as you begin stitching, backstitch. Also, every time you go over an intersection of netting, backstitch. Basically, backstitch as much as you can all the way through the seam. This helps hold the open netting together. It should look like this when you are finished:
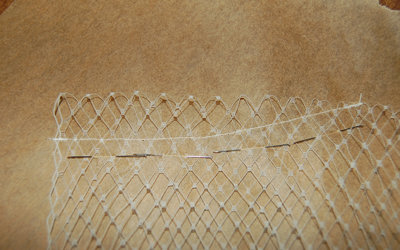 |
Step 4: Gently tear the paper away from the netting
Be careful, but firm. Your netting will look like this when you are done:
|
|
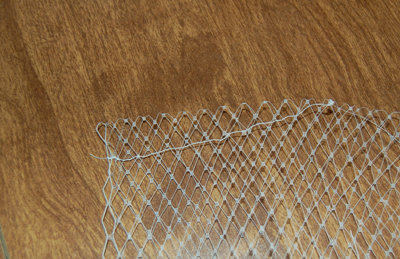
Step 5: Trim the dart
But not too close. If you didn't backstitch enough while sewing in the dart, the netting could come undone easily.
|
|
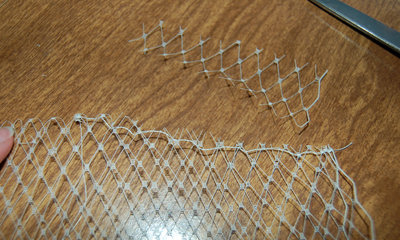
Place the veil on your friend's head and see if you need another dart. I did need to make another small dart for Kaylie, but one may be all you need! If you do add another dart, repeat steps 1–5.
Step 6: Determine where the silk flower will go
Now that you have the shape of the veil, place it on your friend's head and mark the spot where you would like the flower to go. Next, cut four pieces of netting rectangles and four tulle rectangles.
|
|
|
|
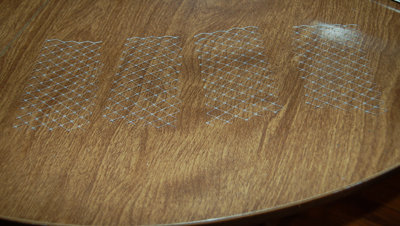
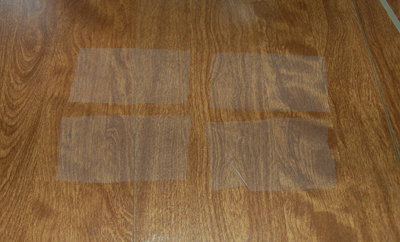
Layer these in an X shape over the spot where your flower will go. This will provide stability when we glue the flower on. Pin all layers to parchment paper and sew through the middle. You only need to sew about an inch long to keep them in place.
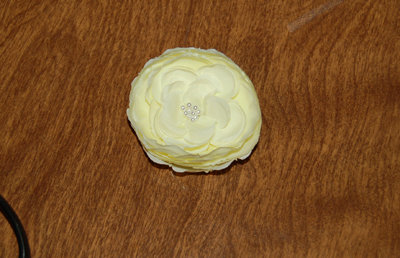
Step 7: Sew pearls into the center of the flower
Take a hand-sewing needle, and thread it. Sew pearl beads (or whatever beads you like) into the center of the flower, to cover up the plastic in the middle. Here's how mine looked:
|
|
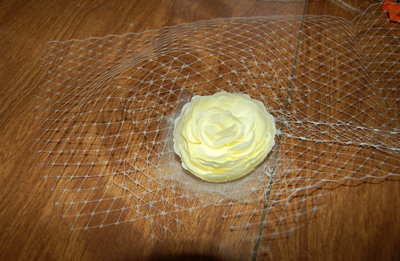
Now place the flower on the center of your tulle "X". Hot glue into place:
|
|
Now bobby pin the veil onto your head. There will probably be areas in the back that you can trim, and you may want to trim the sides to complement your face. If you like, you can take the untrimmed veil to your hairdresser, and he or she can trim it once it is in place. Let's take another look at Kaylie's veil:
|
|

You may want to practice before making the final veil. Try not to be overwhelmed by the "sculpture" aspect of this project—have fun with it!
Veil tip: I helped a friend make some bird cage veils for her bridesmaids last summer, and she spray painted the netting to match the color of the dresses! It was very subtle, and so cute.
Posted by Miss Taffy at 11:21 a.m.
- bride-to-bride's blog
- Log in or register to post comments